
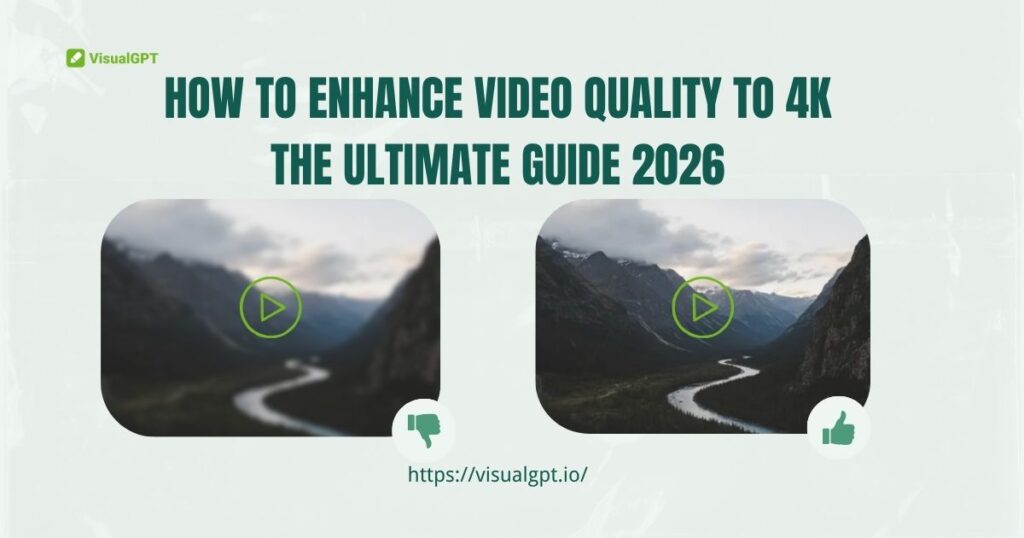
Have you ever spent hours capturing what you thought was the perfect moment, only to review the footage later and find it blurry, grainy, or heavily pixelated? Whether you are a dedicated content creator trying to go viral on TikTok, a professional video editor handling client projects, or just someone trying to salvage a precious family memory, dealing with poor-resolution footage is incredibly frustrating. In today's hyper-visual digital landscape, viewers have zero tolerance for low-resolution media. That is why learning exactly how to enhance video quality is no longer just an optional skill—it is an absolute necessity for anyone working with digital media.
As we move deeper into 2026, the standards for visual content have skyrocketed. Platforms like YouTube, Instagram, and TikTok heavily favor high-definition content in their algorithms, often pushing 4K videos to the top of users' feeds. If your footage looks like it was shot on a decade-old potato, your audience will scroll past it in milliseconds. The good news? You do not need a Hollywood budget or years of complex editing experience to fix it. Thanks to incredible advancements in artificial intelligence, figuring out how to enhance video quality has never been more accessible. If you want to skip the technical jargon and fix your footage right now, you can use the best free AI video enhancer to upscale your clips instantly.
In this comprehensive, ultimate guide for 2026, we will dive deep into the root causes of degraded footage, explore advanced color correction techniques, and reveal the most efficient, free methods available today. By the end of this article, you will master how to enhance video quality and transform your unwatchable, blurry clips into stunning, crystal-clear 4K masterpieces.
Why Does Video Quality Matter So Much in 2026?
Before we dive into the technical solutions, it is crucial to understand why learning how to enhance video quality should be your top priority. The digital ecosystem has evolved, and audience expectations have evolved right alongside it.
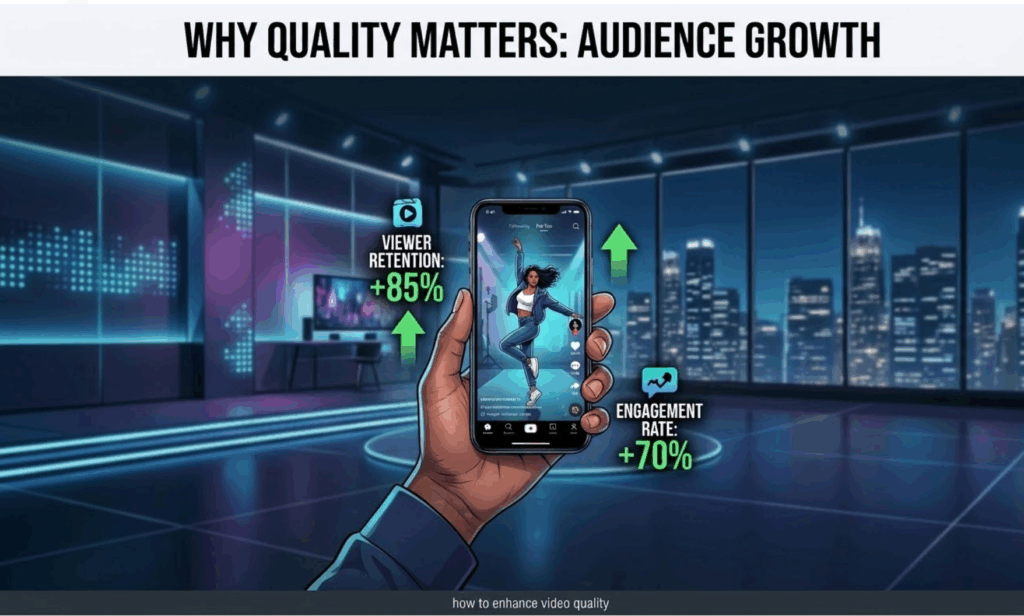
1. The Algorithm Demands High Definition
Social media algorithms in 2026 are ruthlessly optimized for user retention. When a platform detects that a video is highly engaging and visually appealing, it pushes that content to a broader audience. Conversely, low-resolution, noisy videos are penalized. If you are a creator wondering why your views are stagnating, poor resolution might be the hidden culprit. Knowing how to enhance video quality is essentially learning how to please the algorithm.
2. Establishing Professional Trust and Authority
For brands, marketers, and professional editors, visual fidelity is directly tied to brand perception. A crisp, sharp, and vibrant 4K video communicates professionalism, attention to detail, and authority. A pixelated, blurry video communicates amateurism. When you master how to enhance video quality, you instantly elevate your brand's perceived value in the eyes of your audience or your clients.
3. Preserving Priceless Personal Memories
Not every video is meant for millions of followers. Sometimes, the footage you want to save is a digitized VHS tape from your childhood, a poorly lit wedding reception, or a zoomed-in concert video of your favorite band. In these cases, learning how to enhance video quality is about preserving the emotional integrity of a priceless memory so it can be enjoyed by future generations on modern 4K and 8K displays.
What Actually Causes Poor Video Quality?
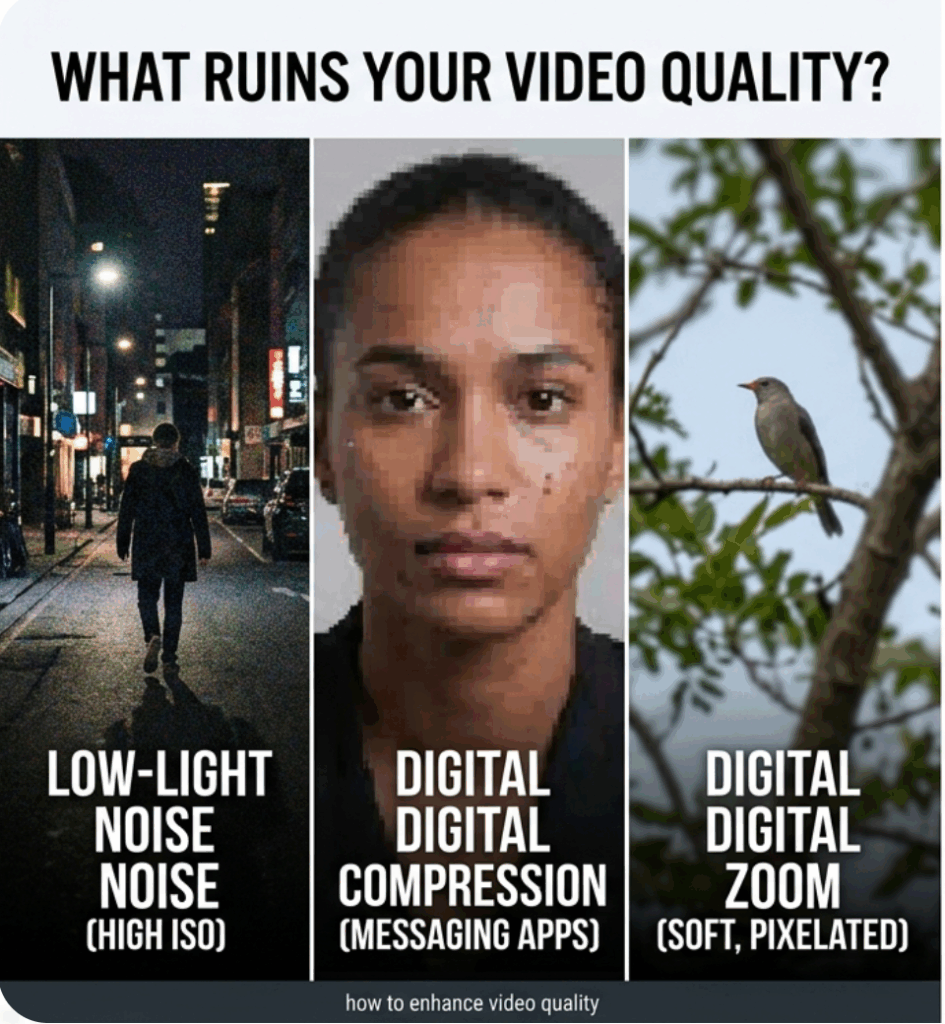
To effectively treat the disease, you must first understand the symptoms. You cannot properly master how to enhance video quality without knowing what ruins it in the first place. Here are the most common culprits behind degraded footage:
- Low-Light Environments and High ISO Noise: When you shoot in the dark without proper lighting, your camera’s sensor struggles to capture enough information. To compensate, the camera artificially boosts its sensitivity (ISO), which introduces ugly, flickering digital noise and grain into your shadows.
- Heavy Digital Compression: This is the silent killer of good footage. When you send a video via WhatsApp, or upload it to social media, the platform severely compresses the file to save server space. This compression throws away valuable pixel data, resulting in blocky artifacts and a lack of sharpness.
- Incorrect Export Settings: Many editors shoot in beautiful 4K but ruin their footage during the final rendering process by choosing a bit-rate that is far too low. Understanding bit-rates is a vital part of knowing how to enhance video quality.
- Digital Zoom: Unlike optical zoom, which uses the physical camera lens to magnify an image, digital zoom simply crops into the sensor and stretches the remaining pixels. This instantly destroys the resolution and makes the footage look incredibly soft and blurry.
The Ultimate Solution: How to Enhance Video Quality Using VisualGPT

If you are looking for the absolute fastest, most effective, and budget-friendly way to upscale your footage in 2026, artificial intelligence is the answer. In the past, recovering lost details from a compressed video was practically impossible. Today, AI neural networks can analyze your blurry frames and mathematically predict and generate the missing pixels, effectively turning a 720p or 1080p video into a stunning 4K clip.
When people ask me how to enhance video quality without spending hundreds of dollars on complex software or spending weeks learning complicated nodes, I point them straight to AI. Specifically, VisualGPT is currently dominating the market as the ultimate solution.
Why is it the best? Because it perfectly understands what creators and casual users need: it is completely free, requires no login or registration, and delivers mind-blowing results up to 4K resolution directly in your browser.
Here is the exact, foolproof step-by-step guide on how to enhance video quality using this powerful AI tool:
Step 1: Upload Your Video
The journey to crystal-clear footage begins with a single click. Navigate to the tool's interface and locate the upload section. You do not need to create an account, verify your email, or hand over your credit card details. Simply drag and drop your blurry, noisy, or low-resolution video file directly into the designated upload area on your browser. The platform supports various standard video formats, making it incredibly versatile for both mobile content and traditional camera footage.
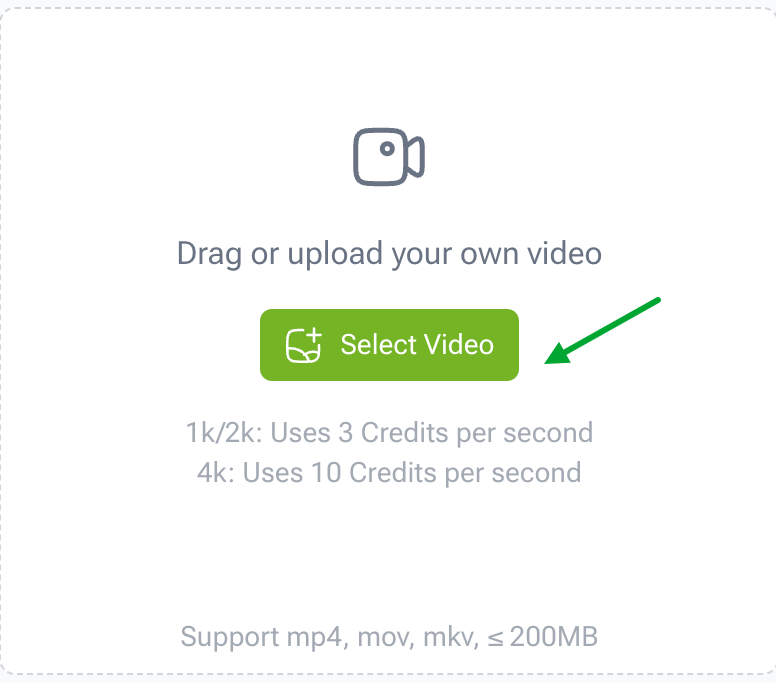
Step 2: Select Your Desired Quality
Once your video is securely uploaded to the secure servers, you are put in the director's chair. You will be presented with intuitive output options. This is where you tell the AI exactly what you want it to do. If you want to know the secret of how to enhance video quality for modern screens, you should aim high. Select your target resolution from the dropdown menu or options panel—you can choose to upscale your footage all the way up to stunning 4K. The AI is trained to handle extreme upscaling while maintaining natural textures and sharp edges.

Step 3: Generate And Download
After selecting your 4K target quality, simply click the "Generate" button. Now, sit back and let the artificial intelligence do the heavy lifting. The advanced neural networks will analyze your video frame by frame, removing compression artifacts, reducing digital noise, and injecting high-fidelity details into every single pixel. Within moments, your newly upscaled, professional-grade video will be ready for download.
If you are tired of dealing with complex timelines and expensive subscriptions, I highly recommend you use this AI video enhancer to upscale to 4K right now to see the dramatic difference for yourself.
Alternative Methods: How to Enhance Video Quality with Traditional Software

While AI one-click solutions are the most efficient route for 99% of users in 2026, professional editors may still want to know how to enhance video quality using traditional non-linear editing (NLE) desktop software like Adobe Premiere Pro, Final Cut Pro, or DaVinci Resolve. While these tools have a steep learning curve and require expensive, high-end computers, they offer granular control over your footage.
1. Advanced Color Correction and Grading
Sometimes, a video appears "low quality" not because it lacks resolution, but because the colors are flat, washed out, or poorly white-balanced. Learning how to enhance video quality involves mastering color correction. By adjusting the contrast, pulling down the shadows, and slightly boosting the saturation, you can give your footage a much richer, high-quality cinematic look. DaVinci Resolve is currently the industry standard for this process.
2. Applying Unsharp Mask and Sharpening Filters
If your footage is slightly out of focus or soft due to a cheap lens, traditional software allows you to apply sharpening filters. An "Unsharp Mask" works by increasing the contrast along the edges of objects in your video, tricking the human eye into perceiving the image as sharper. However, a major rule of learning how to enhance video quality is moderation: applying too much artificial sharpening will introduce harsh halos and make the video look worse.
3. Utilizing Professional Noise Reduction
High-end software comes equipped with temporal and spatial noise reduction tools. If you shot a video at a high ISO in a dark room, these tools can smooth out the dancing, colorful pixels (chroma noise) without completely destroying the underlying details of the image. However, these traditional rendering processes can take hours, which is why many professionals are now supplementing their workflow with AI tools.
Preventative Measures: Shooting High-Quality Video from the Start
The golden rule of digital media is "garbage in, garbage out." While modern AI can perform miracles, the absolute best way to solve resolution issues is to avoid them entirely during production. If you truly want to master how to enhance video quality, you must start behind the camera.
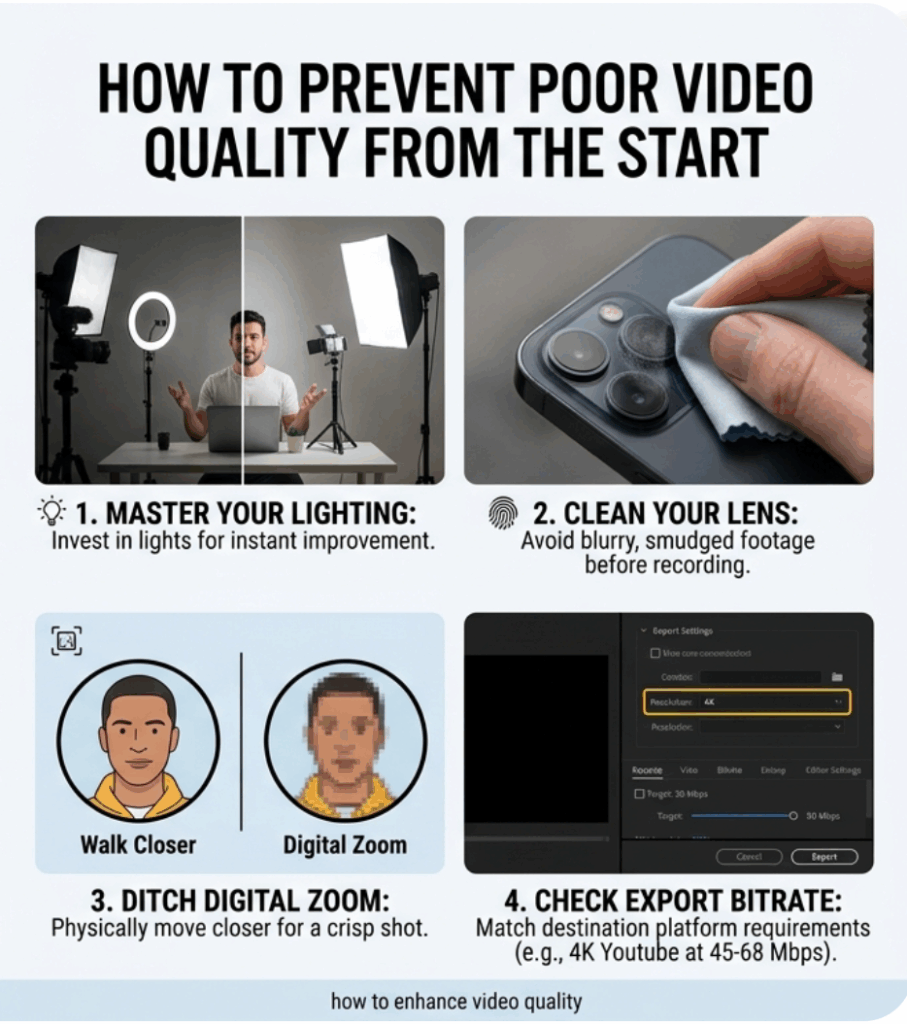
- Master Your Lighting: Cameras crave light. Even a flagship $3,000 camera will produce grainy, terrible footage in a dark room, while a budget smartphone can shoot breathtaking 4K video if the subject is bathed in beautiful, soft, natural daylight. Invest in a cheap ring light or softbox; it is the easiest trick in the book for how to enhance video quality before you even press record.
- Clean Your Lens: It sounds ridiculously simple, but you would be shocked at how many people complain about blurry footage when the only problem is a greasy fingerprint smeared across their smartphone lens. Wipe it down with a microfiber cloth before every single shoot.
- Ditch the Digital Zoom: As mentioned earlier, zooming in digitally simply destroys your pixel count. If you need a closer shot, physically walk closer to your subject.
- Check Your Export Bitrate: When exporting from editing software, always ensure your bitrate matches the destination platform's requirements. For 4K YouTube videos, aim for a bitrate of at least 45 to 68 Mbps.
Frequently Asked Questions (FAQs)
To ensure this 2026 guide is as comprehensive as possible, let's address some of the most common questions people have when searching for how to enhance video quality.
Can I really enhance a 480p or 720p video to 4K?
Yes, absolutely. While traditional upscaling would just stretch the image and make it blurry, modern AI tools utilize machine learning to "hallucinate" and fill in the missing data accurately. This makes the leap from 480p to 4K not only possible but incredibly impressive.
Is there a completely free tool to fix blurry videos online?
Yes. While many legacy software companies charge hefty monthly subscriptions or put their final renders behind ugly watermarks, there are modern alternatives. Knowing how to enhance video quality for free is easy when you use tools like VisualGPT, which offers high-end 4K upscaling without requiring a login or a credit card.
Does enhancing video quality increase the file size?
Yes. When you figure out how to enhance video quality and upscale a clip from 1080p to 4K, you are generating millions of new pixels. This added data will naturally result in a larger file size. Ensure you have adequate storage space on your device before downloading your newly enhanced high-definition masterpieces.
Conclusion and Next Steps
We have covered a massive amount of ground in this 2026 ultimate guide. From understanding the devastating effects of social media compression to mastering lighting techniques and exploring traditional color grading, you now possess a deep, comprehensive understanding of how to enhance video quality.
Remember, viewers in today's fast-paced digital world demand crisp, engaging, and high-resolution content. You can no longer afford to let blurry, grainy footage hold back your creative potential, hurt your brand's reputation, or ruin your cherished personal memories.
You do not need to be a Hollywood colorist to fix your footage. With the power of artificial intelligence, the process has been democratized. If you have a video sitting on your hard drive right now that needs rescuing, do not wait. Take action, follow the simple three-step process we outlined (Upload, Select Quality, Generate), and try this free online video enhancer today to instantly transform your low-resolution clips into breathtaking 4K reality!