If you manage an e-commerce brand, you already know the harsh reality of online retail: your customers cannot touch, feel, or try on your products. The only thing standing between a browsing visitor and a confirmed sale is the visual quality of your listings.
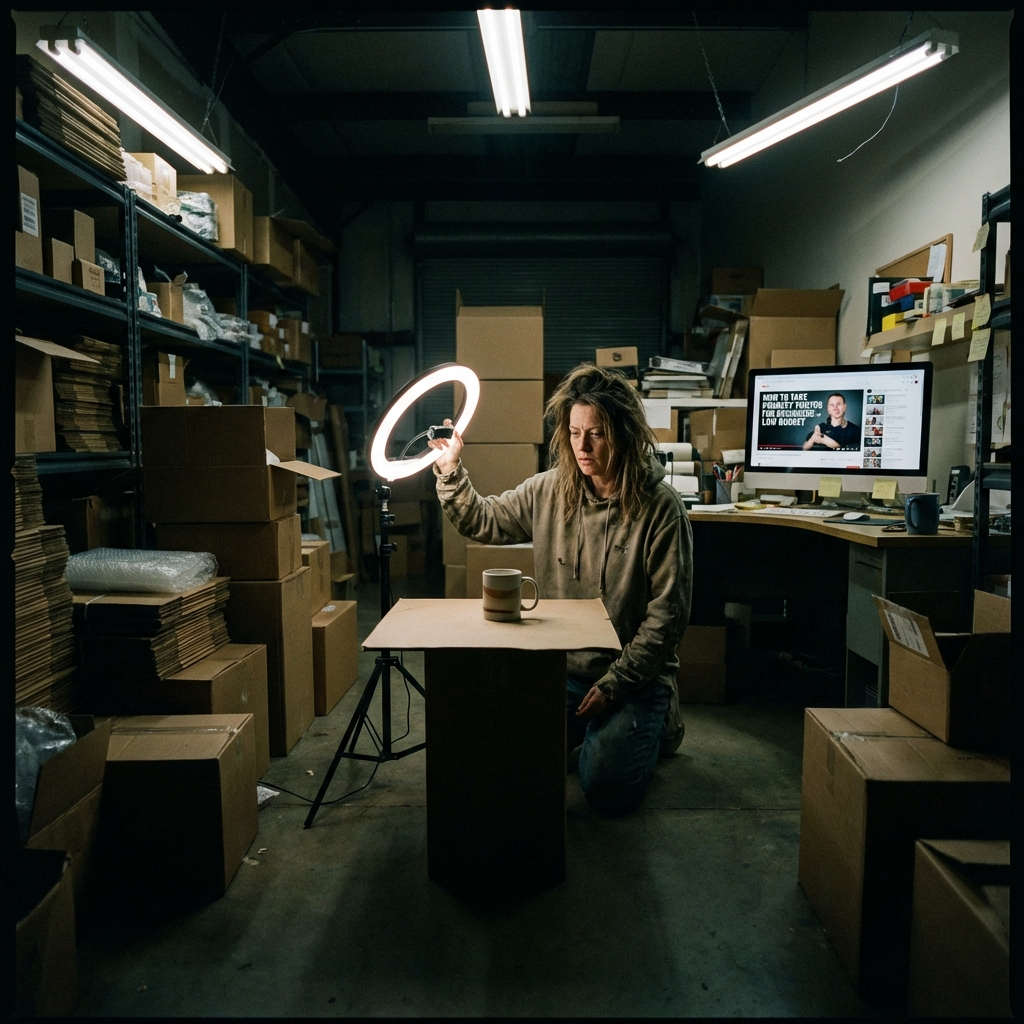
For a long time, our small eight-person e-commerce team struggled with this exact bottleneck. We were launching up to 50 new SKUs every single month, and our biggest nightmare was content creation. If you have ever found yourself kneeling on a hard warehouse floor at midnight, desperately holding a cheap ring light over a new product, frantically searching YouTube for tutorials on how to take product photos that do not look completely amateur, you are definitely not alone.
In this comprehensive guide, we are not going to give you generic advice about "finding good window light" or "buying a DSLR." Instead, we are going to share our team's real, frustrating three-week journey of trying to build an in-house studio, the money we wasted, and the ultimate decision that changed our entire workflow. We will break down exactly how to take product photos efficiently today, and why we completely abandoned traditional photography methods for an AI-driven solution.
Introduction: Our 3-Week Nightmare Trying to Shoot E-commerce Products
A few months ago, our store was preparing for a major seasonal launch. We had the inventory ready, the website optimized, but our visuals were severely lacking. We realized that figuring out how to take product photos was going to be the biggest hurdle of the quarter.
Initially, we decided to do it all in-house to save money. We bought a large white shooting tent, three LED softbox lights, seamless paper rolls, and a decent mirrorless camera. The initial investment was around $800. We thought we had successfully solved the problem of how to take product photos on a budget. We were wrong.
The reality was a disaster. Setting up the lights took hours. Getting rid of harsh shadows was nearly impossible. The white balance was always slightly off, making our beautifully colored products look dull and washed out. After three weeks of intense effort, we had spent over 60 man-hours shooting and editing, and the results still looked like they belonged on a 2010 eBay listing. Our CTR (Click-Through Rate) on ads dropped by 15%, and our conversion rate stagnated. We realized that simply knowing the technical basics of how to take product photos was not enough; you need an efficient system.
Our Selection Criteria: What Actually Matters for E-commerce Imagery

After our disastrous DIY attempt, we held an emergency team meeting. We needed to fundamentally rethink how to take product photos for our catalog. We realized that our initial approach was flawed because we were thinking like hobbyist photographers, not like business owners.
When searching for new solutions on how to take product photos, we established a strict set of criteria that any new method had to meet:
- Turnaround Time (Speed to Market): In e-commerce, time is money. A product sitting in the warehouse waiting to be photographed is a product not making money. The solution had to deliver final images in under 24 hours.
- Cost Control and Scalability: We could not afford to spend $50 per photo, especially when launching 50 items a month with multiple angles required. The cost needed to be under $5 per final image.
- Physical Space Requirements: We operate out of a small office and warehouse. We could not afford to dedicate 200 square feet permanently to a photography studio setup.
- Aesthetic Consistency: Whether we shot a product in January or July, the lighting, shadows, and branding had to look uniform across the entire website.
- Contextual Lifestyle Backgrounds: White background photos are essential for Amazon, but for Shopify and Instagram ads, we needed lifestyle shots (e.g., a skincare bottle sitting on a marble bathroom sink with morning sunlight).
With these strict business criteria in mind, we went back to the drawing board to finally master how to take product photos at scale.
Traditional Methods vs. AI: The Methods We Tested
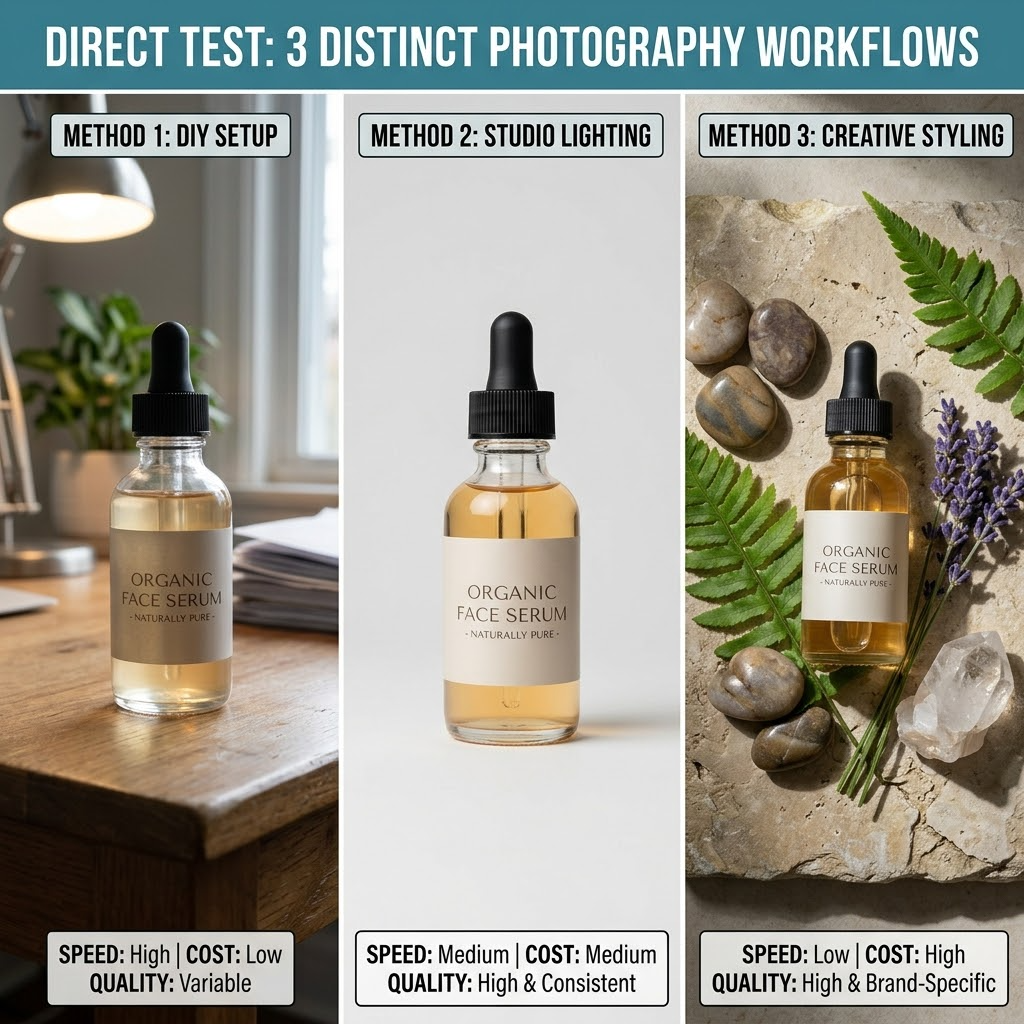
To find the ultimate workflow, we ran a direct test on three distinct methods. We took a single new product—a newly formulated organic face serum in a glass dropper bottle—and pushed it through three different photography pipelines. Here is what we discovered about how to take product photos using each approach.
Method A: The DIY Smartphone Setup (Cost: ~$150 + Our Sanity)
We decided to try the most common advice found online for small businesses learning how to take product photos. We used an iPhone 14 Pro, a large white poster board near a bright window, and a bounce reflector.
- The Process: We waited for a sunny day, set up the table near our office window, and snapped dozens of pictures.
- The Good: It was virtually free, excluding the cost of the phone we already owned.
- The Bad: The reflections on the glass bottle were uncontrollable. The window frame reflected directly onto the product. When the clouds moved, the lighting changed, ruining the consistency. Furthermore, cutting out the background manually in Photoshop took an extra 20 minutes per photo.
- The Verdict: While it's a great starting point for extreme beginners, relying on the weather is no way to run a professional e-commerce brand. This did not solve our core issue of how to take product photos efficiently.
Method B: Hiring a Professional Agency (Cost: $50+ per photo)
Next, we outsourced the problem. We packed up our products and shipped them to a boutique commercial photography studio. If we couldn't figure out how to take product photos ourselves, we would pay the experts.
- The Process: We filled out a creative brief, shipped the products, and waited.
- The Good: The quality was undeniably fantastic. The lighting was perfect, the glass reflections were beautifully managed, and the lifestyle props looked highly professional.
- The Bad: It took 14 days from shipping to receive the final edits. Furthermore, the invoice for just 10 photos of one product was $500. If we scaled this to our 50 monthly SKUs, we would be spending $2,500+ a month just on basic imagery. We also were limited to just one round of revisions.
- The Verdict: Perfect for hero images on a homepage, but financially impossible for high-volume catalog management.
Method C: The Game-Changer – AI Product Photography
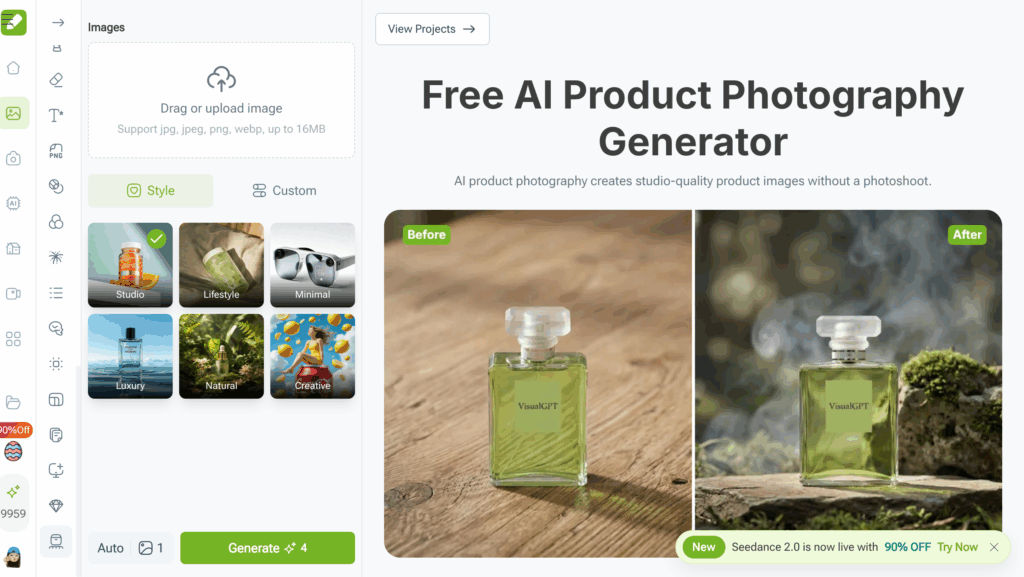
This was the turning point for our business. We started reading about artificial intelligence and realized that the modern answer to how to take product photos might not involve a camera at all. We decided to test a dedicated software solution and completely overhaul our approach by utilizing use VisualGPT for AI product photography.
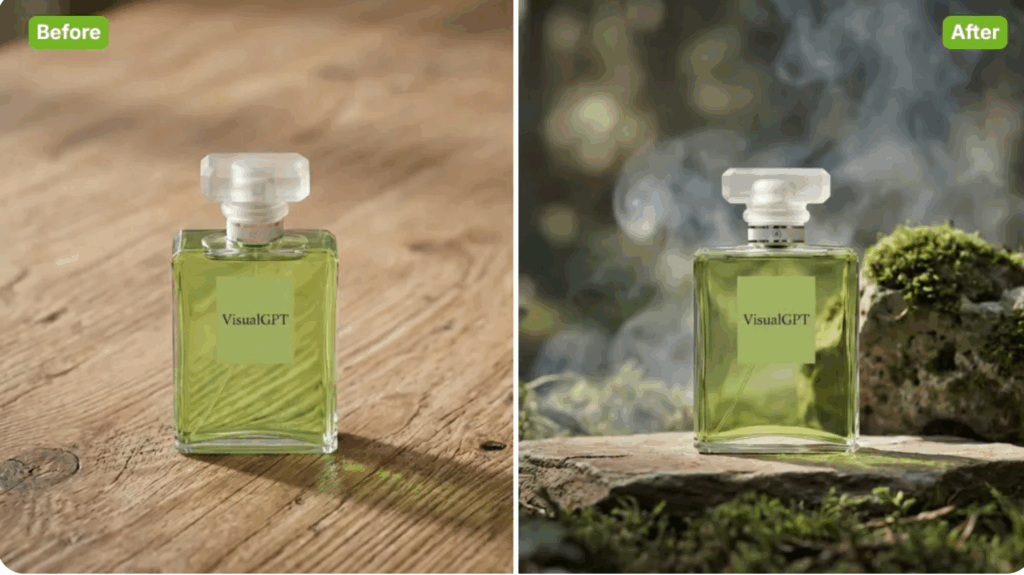
- The Process: We took a basic, unedited photo of our serum bottle on a regular office desk using a smartphone. No special lighting, no tripods. We uploaded this flat image into the AI platform. Within seconds, the software automatically and flawlessly removed the messy background. We then typed a simple prompt: "A sleek skincare bottle sitting on a wet stone slate in a serene spa environment, soft morning sunlight filtering through bamboo leaves, ultra-realistic."
- The Good: In less than 15 seconds, we generated four variations of breathtaking lifestyle photography. The AI understood the lighting, generated realistic reflections on the glass, and created shadows that matched the digital sun source perfectly. The cost was literally pennies per generation. We didn't need to buy props, rent a studio, or wait for sunny weather.
- The Bad: There is a slight learning curve in figuring out the best text prompts to get exactly what you want, but this took merely an hour to master.
- The Verdict: This was the holy grail we had been searching for. It completely revolutionized how to take product photos for our entire catalog.
The Ultimate Comparison: DIY vs. Studio vs. VisualGPT
To make things crystal clear, we documented our findings. If you are an e-commerce manager currently struggling with how to take product photos, this data is exactly what you need to see. Google algorithms and modern consumers alike value structured, transparent data, so here is the honest breakdown of our tests:
When you look at the raw data, the traditional approach to how to take product photos simply cannot compete with the speed and economic efficiency of modern AI tools.
Why VisualGPT is Our Final Choice (The Numbers Speak)
When industry peers ask us how to take product photos at our current volume without going bankrupt, we no longer recommend lighting kits. We simply open our laptops and show them our dashboard.
Our ultimate decision to exclusively use AI was driven by undeniable business metrics. After transitioning our workflow, we tracked our performance for three months. The impact of generating AI product photography for our store was staggering:
- 30+ Hours Saved Weekly: We completely eliminated the physical setup, teardown, and manual background removal process. Our creative team now spends their time strategizing marketing campaigns instead of wrestling with softboxes.
- Cost Reduction of 95%: We went from budgeting nearly $1,500 a month for ad-hoc professional photography and prop purchases to a small, predictable monthly SaaS subscription.
- Infinite A/B Testing: This is perhaps the biggest hidden benefit. In the past, if a lifestyle photo didn't perform well on Facebook Ads, we were stuck with it. Now, if we need to know how to take product photos that convert better for a specific demographic, we just generate new ones. We can put the same serum bottle on a snowy mountain for a winter campaign, and on a sunny beach for a summer campaign, in under two minutes.
- Surge in Click-Through Rates: Because our images look like they were shot in high-end environments (marble countertops, designer living rooms, tropical resorts), the perceived value of our products skyrocketed. Our ad CTR increased by 22%.
By fundamentally changing our perspective on how to take product photos, we unblocked our biggest operational bottleneck.
Who Should NOT Use AI Product Photography

At this point, you might think AI is the magic bullet for every single business on earth. As part of our commitment to transparent, real-world advice on how to take product photos, we must highlight that AI is not for everyone.
You should not rely exclusively on AI generation if:
- You Sell Highly Intricate Technical Parts: If you are selling microchips, precise engine components, or specialized medical equipment where every single microscopic millimeter, texture, and text inscription must be 100% physically accurate to a technical spec sheet, stick to traditional macro photography. AI can sometimes gently hallucinate edge details.
- Apparel with Unique Fabric Textures: While AI is getting incredibly good at clothing, if the core selling point of your luxury garment is the microscopic weave of a rare silk, a traditional high-megapixel studio camera might still be necessary for those extreme close-ups.
- You Have Strict Legal Compliance Needs: Certain industries require unedited, raw photographs of the exact product unit being sold (e.g., selling graded, highly valuable antique coins or specific used cars).
However, for 95% of standard e-commerce brands selling cosmetics, packaged goods, accessories, standard apparel, furniture, and consumer electronics, rethinking how to take product photos with AI is the smartest operational move you can make.
Conclusion: Stop Struggling and Start Generating
The rules of e-commerce are changing rapidly. The brands that win are the ones that can iterate quickly and present high-perceived-value imagery without inflating their operational costs. If you are still wasting your weekends trying to figure out how to take product photos with white poster boards and cheap ring lights, you are fighting a losing battle against competitors who have already adopted the future.
You no longer need to be a master of lighting, aperture, and Photoshop to run a visually stunning online store. The secret to how to take product photos today is realizing that you don't actually need to "take" them at all—you just need to generate them.
Stop struggling with shadows, stop waiting weeks for expensive agencies, and stop letting poor visuals hurt your conversion rates. It is time to step into the future of e-commerce content creation. Ready to transform your catalog? You can create stunning product photos with VisualGPT today and watch your brand's aesthetic—and your sales—reach new heights.