
Creating high-quality, cinematic video content has historically been one of the most resource-intensive and frustrating bottlenecks for digital marketers, creative agencies, and short-video entrepreneurs. For decades, producing a high-quality promotional clip or a talking-head video meant hiring a professional videographer, purchasing overpriced stock footage, and spending agonizing hours wrestling with complex timeline-based post-production software. However, the landscape of digital video production has permanently and radically shifted. If you want to remain competitive, capture audience attention, and scale your visual assets without blowing your annual marketing budget, mastering how to use Grok Imagine Video 1.5 is no longer just a luxury—it is an absolute operational necessity.
In this exhaustive, hands-on guide, our dedicated video production team is going to walk you through exactly how to use Grok Imagine Video 1.5. We will bypass the generic, low-value feature lists that flood the internet and instead share our first-hand real-world business experience. We will detail the exact professional workflows, prompt engineering strategies, and decision-making processes we utilize daily to generate professional-grade videos.
Whether you are a solo content creator trying to build a brand or a large-scale enterprise creative director, understanding how to use Grok Imagine Video 1.5 will allow you to completely bypass legacy video editors. By migrating your creative pipeline to a dedicated, professional Grok Imagine Video 1.5 generation platform, you can seamlessly leverage xAI's revolutionary architecture to transform simple static images into audio-synced commercial blockbusters.
The Paradigm Shift: Why xAI's Generative Video Model Changes Everything
Before we dive into the technical step-by-step instructions, it is crucial to understand exactly why this specific model is rapidly replacing traditional rendering pipelines across the globe. As a high-intensity creative team handling dozens of short video campaigns and vlog projects weekly, we have tested numerous AI tools that promised "hyper-realistic" results. Unfortunately, they consistently failed miserably regarding character consistency, spatial physics, and audio processing, leading to heavy, time-consuming post-production fixes.
When we began deeply researching how to use Grok Imagine Video 1.5, we discovered that its core advantages directly address and solve the deepest pain points of current AI video creators.
Tier-One Image-to-Video (I2V) Capabilities Shaking the Industry
When you learn how to use Grok Imagine Video 1.5, you will quickly discover that this model's true battlefield is its incredibly powerful Image-to-Video (I2V) capability. In the past, many AI tools would cause severe structural distortion or "melting" when processing images. Grok 1.5 completely subverts this technological hurdle.
After uploading a reference picture, the engine maintains extremely high character consistency, highly stable composition, and the stylistic direction rarely deviates from the source. It acts more like magic, seamlessly "making the image natively move," rather than entirely abandoning the original image to hallucinate an uncontrollable video sequence. In this core metric, it stands shoulder-to-shoulder with platforms like Kling, Veo, and Seedance, firmly securing its place in the global first tier of visual generation. Understanding how to use Grok Imagine Video 1.5 means unlocking the pinnacle of I2V stability.
Revolutionary Native Audio and Flawless Talking Capabilities
Another massive reason digital professionals are rushing to figure out how to use Grok Imagine Video 1.5 is that it possesses one of the most recognizable and disruptive core capabilities available today: native audio generation. When generating a video, it can synchronously generate character dialogue, ambient sound, environmental sound effects, and even background music directly within the initial output.
This means you no longer need to rely on external tools like ElevenLabs or Suno for tedious post-production dubbing. For example, a seaside scene automatically generates the crashing sound of ocean waves; a busy street scene comes with authentic ambient city noise. Most impressively, when a character speaks, it automatically generates extremely precise lip-synced speech! The community universally agrees that for dialogue, vlogs, anchor broadcasts, and interviews, it is the absolute undisputed king. Compared to previous generations, its expressions are more natural, and its micro-movements are much richer. This makes figuring out how to use Grok Imagine Video 1.5 an absolute game-changer for TikTok, Reels, and Shorts creators.
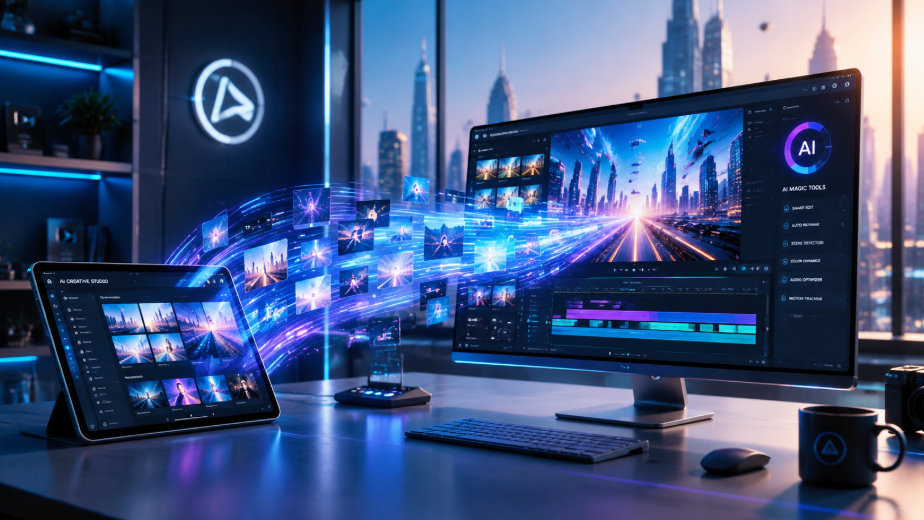
A Detailed Practical Workflow: How to Use Grok Imagine Video 1.5
Grasping the hardcore technical advantages behind the generative model is excellent, but executing it flawlessly requires a structured, repeatable workflow. Here is our battle-tested core methodology to teach you how to use Grok Imagine Video 1.5 to maximize commercial impact without wasting your valuable generation credits.
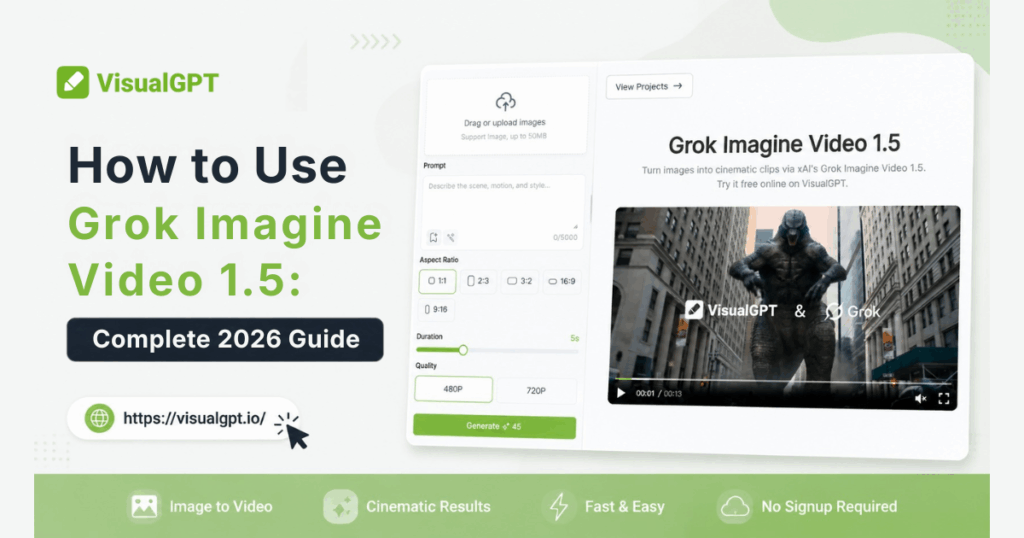
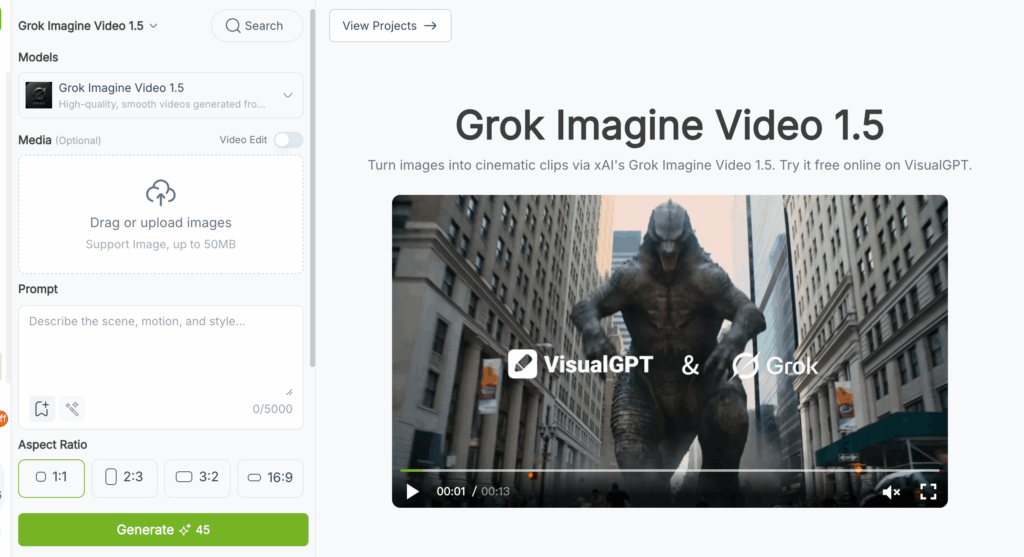
Step 1: Initiating Your Workspace and Media Upload
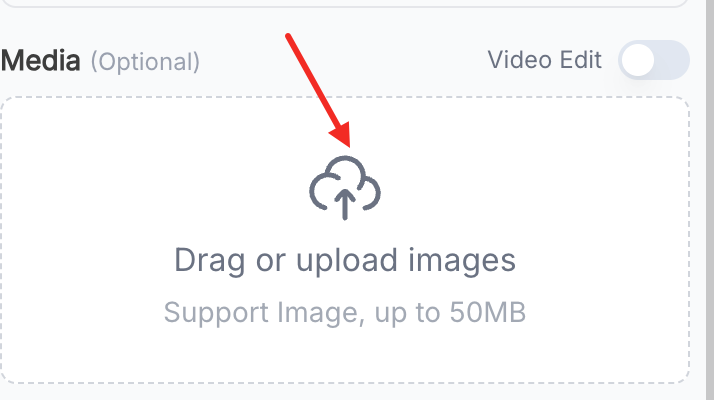
To begin, you need to access an environment designed for professional digital rendering. Once inside the workspace, the first decision in mastering how to use Grok Imagine Video 1.5 is choosing your core input method. The left-hand panel provides a highly intuitive and clean "Media" module.
Given its formidable I2V capabilities, we strongly recommend utilizing the media upload area. This area generously supports image files up to 50MB. By uploading a high-resolution reference image of your actual physical product, human character, or broadcasting anchor, you can ensure that the final generated video maintains precise visual consistency. This is the foundational cornerstone of understanding how to use Grok Imagine Video 1.5 and applying it to serious corporate brand building.
Step 2: Engineering the Perfect Scene and Audio Prompt
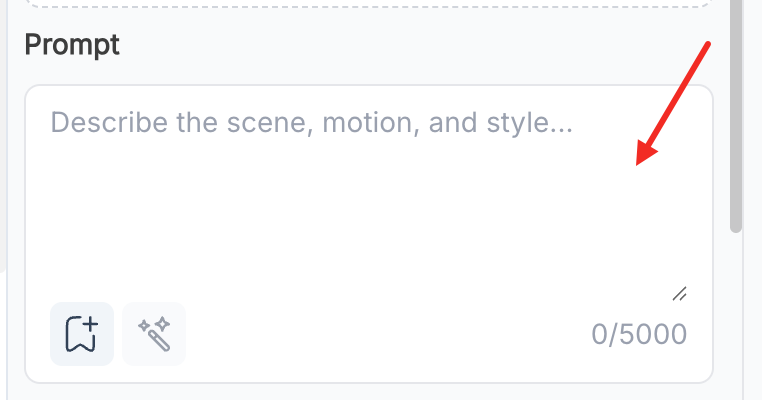
The true secret to mastering how to use Grok Imagine Video 1.5 lies hidden within your prompt engineering skills. Because this model natively supports audio generation and complex facial micro-movements, your text prompt should never be a dry, single-sentence description; it should read exactly like a professional director's scene script. Inside the Prompt box, you have an astonishing capacity of up to 5000 characters, allowing you to freely build the world and meticulously describe the scene, sound, and action.
When we train new creative team members on how to use Grok Imagine Video 1.5, we strictly enforce this advanced prompt formula: [Subject Identity] + [Environmental Details] + [Specific Camera/Micro-movements] + [Dialogue/Ambient Audio].
- Bad Prompt Example:"A girl talking."
- Professional Prompt Example: "A young female vlogger in professional business attire sits in a sunny cafe, smiling and speaking directly to the camera. Shot on a camera stabilizer, 8K ultra-clear cinematic image quality. The woman has rich facial micro-movements, natural and smooth expressions, and perfectly synchronized lip movements. The background is accompanied by slight cafe white noise and soft jazz background music."
Knowing how to use Grok Imagine Video 1.5 means absolutely never being lazy with your descriptive text and audio environment details.
Step 3: Selecting the Optimal Aspect Ratio
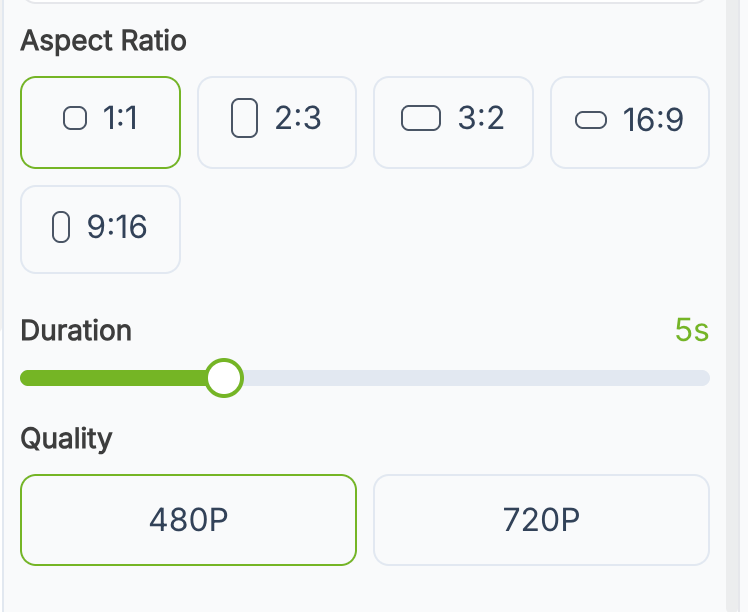
One of the most practical and time-saving aspects of learning how to use Grok Imagine Video 1.5 is its native formatting flexibility. Traditional video resizing after rendering often results in awkward cropping or distorted subjects. The interface elegantly solves this by allowing you to select your precise Aspect Ratio directly below the prompt box before generation.
Depending on your digital distribution strategy, you can quickly select:
- 1:1 - Perfect for standard Instagram grid posts and LinkedIn feeds.
- 2:3 - Ideal for modern, slightly taller mobile displays.
- 3:2 - Excellent for traditional web viewing proportions.
- 9:16 - The absolute core standard for vertical short video platforms like TikTok, Reels, and YouTube Shorts.
- 16:9 - The undisputed golden standard for YouTube, cinematic presentations, and widescreen monitors.
By selecting the correct ratio upfront (especially 9:16), your generated talking-head video is immediately ready for mobile publishing without any secondary timeline editing. This is exactly why a deep understanding of how to use Grok Imagine Video 1.5 can drastically reduce your time-to-market.
Step 4: Generation and Real-Time Iteration
Once your high-definition media file is uploaded, your 5000-character prompt is carefully designed, and your specific aspect ratio is locked in, the final step is to click the prominent green "Generate" button.
Thanks to xAI's powerful infrastructure, the generation speed of standard audio-synced clips is astonishing. However, a critical part of knowing how to use Grok Imagine Video 1.5 involves mastering the art of iteration. If the lip sync has a slight flaw or the ambient noise is too loud, you do not need to start entirely from scratch. Simply tweak a few words regarding the sound or movement in your prompt description and generate it again. To quickly run through this high-conversion workflow within your own team, you can immediately start creating with Grok Imagine Video 1.5 on our dedicated generation platform.
Advanced Commercial Applications: How to Use Grok Imagine Video 1.5 in Business
Why does our digital agency value learning how to use Grok Imagine Video 1.5 so highly during our internal team training? Because mastering this I2V tool with native audio can directly and exponentially increase the output efficiency of a short video matrix. Here is exactly how we apply it in real-world commercial scenarios.
Revolutionizing E-Commerce and Product Explanations

In the past, filming a video of a real person explaining a product required finding a model, renting a studio, recording audio, and syncing the lip movements in post-production. Now, the entire workflow is completely digitized. After figuring out how to use Grok Imagine Video 1.5, we simply upload a static photo of the model and input the explanatory dialogue and ambient sound instructions into the prompt.
The AI automatically maintains extremely high character consistency, giving them highly natural facial expressions and perfect lip-sync capabilities. Learning how to use Grok Imagine Video 1.5 will drop the production costs of your product explainer videos and overseas e-commerce short videos to absolute rock bottom.
Accelerating High-Retention Short Video Matrix Production
The algorithms of TikTok and Instagram Reels heavily favor native content with rich audio-visuals and strong character expressiveness. Figuring out how to use Grok Imagine Video 1.5 allows our social media operators to effortlessly transform static influencer photos or anchor screenshots directly into a dynamic Vlog snippet with real ambient sound effects. By outputting directly in the 9:16 ratio, without needing to pass through external editing software for voiceovers, our content output volume has increased by an astonishing 400%.
Troubleshooting: Common Mistakes to Avoid
Even with the most advanced tools, human error can easily disrupt the final output. As you practice and continually refine how to use Grok Imagine Video 1.5, be sure to actively avoid these common production pitfalls:
- Forgetting to Utilize Audio Prompts: This is a model with native sound! If you do not describe the sound in the prompt (such as dialogue, ocean waves, or street noise), you are wasting half of its formidable power. Understanding how to use Grok Imagine Video 1.5 means you must simultaneously act as both the visual director and the sound engineer.
- **Unrealistic Camera Movements:**While the character micro-movements are fantastic in Vlog and interview scenarios, do not demand overly exaggerated 360-degree massive rotations, as this will destroy the stability of the composition. Keep camera movements deliberate and smooth.
- **Uploading Low-Quality Reference Images:**Since its core battlefield is Image-to-Video generation, your output quality will heavily depend on your input. Learning how to use Grok Imagine Video 1.5 requires you to feed the engine the highest quality base assets with clear character faces and good lighting.
Conclusion: Elevate Your Visual and Short Video Strategy Today
The outdated methods of manually splicing clips together, desperately searching for royalty-free background music, and staying up all night to manually sync lip movements are rapidly being completely phased out of the industry. An accurate, deep understanding of how to use Grok Imagine Video 1.5 is no longer just a neat tech trick; it is a fundamental revolution in short video and visual workflows. Its firmly established first-tier Image-to-Video capabilities, along with its breathtaking native audio and speaking performance, provide modern marketers with an undeniable competitive advantage.
Stop letting tedious post-production dubbing and low-end AI models prone to distortion slow down your creative pipeline. Empower your marketing team, easily build your viral short video matrix, and click to experience Grok Imagine Video 1.5 online right now to feel the unquestionable future of professional content creation. Once you fully master how to use Grok Imagine Video 1.5, your short video production speed, visual quality, and audience retention will welcome an irreversible, disruptive upgrade.